InBox ServiceTemplate
Version 7.0.1
Creation date 2019-01-25
Resources
Create Contracts
This module makes it possible to add a standard text template and associate it with a service. It allows, through administration, to add a new template with Subject and Text, making it possible to associate this template with a service. A model can be associated with several services, but a service can only be associated with one model. The module also allows the creation of a ticket, when selecting a service, depending on the configured association, it will fill the Subject and Text field with the associated template.
Manage Contracts
We can also manage contracts by consuming hours.
Prerequisites
Framework
The following versions of the Znuny framework are supported:
- 7.0.x
Modules
The following modules are required:
- InBox Core 7.0.1 ou superior
Operational system
The following operating systems are required:
- [None]
Third Party Software
The following third party software is required:
- [None]
Installation
bin/znuny.Console.pl Admin::Package::Install /path/to/InBox\ ServiceTemplate-7.0.1.opm
Configuration
ServiceTemplate::PreferenceFieldMappingToScreen
It is possible to map a value from the service preferences in the opening screen. To do so, define the preference key in the configuration, and the name of the dynamic field in the value.
Example: ServicePreference01 -> DynamicField_CustomFieldText ServicePreference02 -> DynamicField_CustomFieldSelect
Load JS at the opening of the ticket
The only possible configuration and the loading of the Javascript file on the screen that you want to use from the template for service:
If installing the module, the JS file is not loaded and it is possible to do it manually.
Access the configuration referring to the ticket opening screen that you want to use the ServiceTemplate, and add JS:
Core.Agent.ServiceTemplate.js
Examples of screens:
Loader::Module::AgentTicketEmail###002-Ticket
Loader::Module::AgentTicketPhone###002-Ticket
Loader::Module::AgentTicketProcess###002-ProcessManagement
Loader::Module::CustomerTicketMessage###002-Ticket
Loader::Module::CustomerTicketProcess###002-ProcessManagement
Usage
Exporting templates
It is possible to export the complete templates or just one of them, for that click on the 'Export templates' button or on the icon in the list.
Import templates
After exporting a module .yml example. It is possible to import data via module.
Remember that the module only accepts the service in only 1 template. And template name is considered to overwrite.
Manage service templates
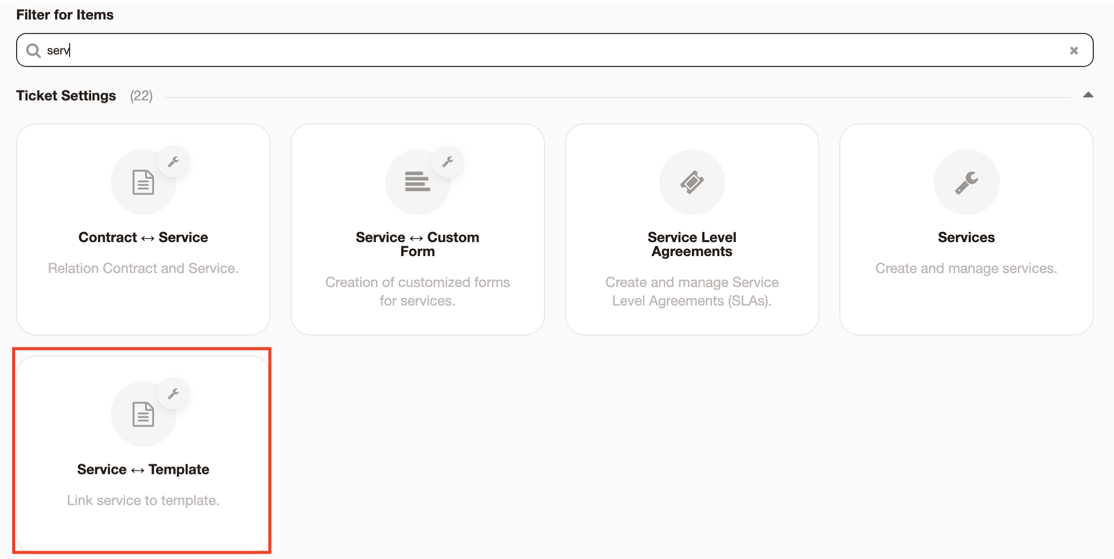
To manage service templates, go to Administration-> Services <-> Template:
After accessing, a view will be displayed with all the templates already registered, on this screen there is the possibility to use the filter field to filter by the name of the model, add a new model and edit models already registered.
Register Template
To register a new template click on “Add Service Model”.
After that, a screen with the template fields will be displayed, in the “Name” field and it is necessary to inform a unique name for the model, right below in the service field and it is necessary to select which service this template will be associated with, being able to select one or more services, only the services that are available will be listed (services that are not associated with any other template).
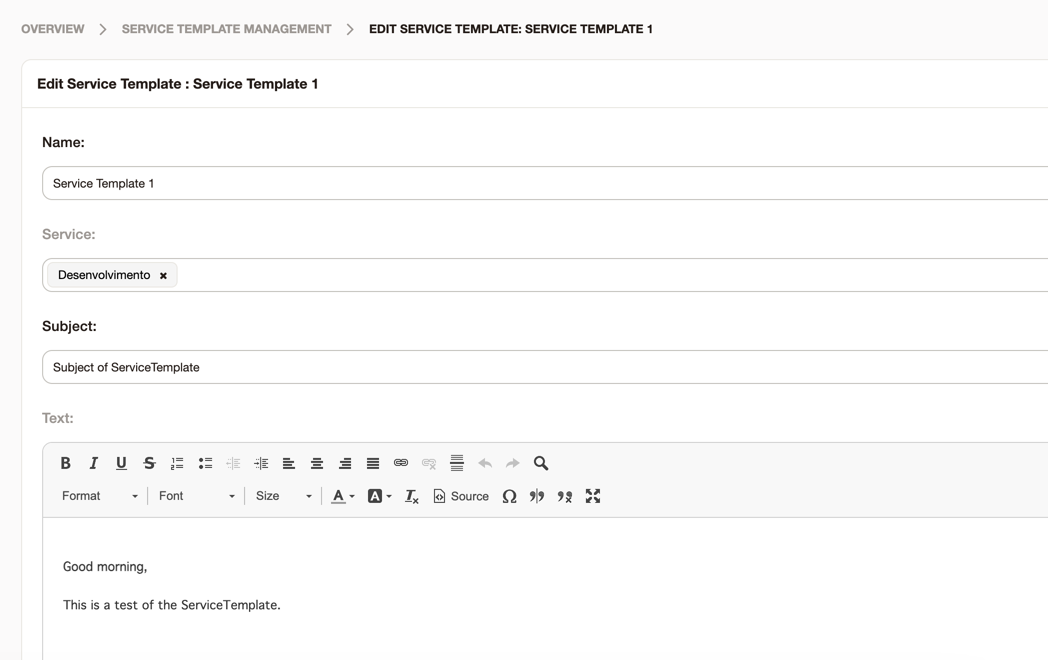
Now it is necessary to inform the Subject and the Text that you want to have as a standard for the selected services, with the texts defined, it is possible to choose the validity of the template (invalid templates will not be applied when creating tickets) and add a comment. If everything is right click on Save, or Cancel to not save the new template:

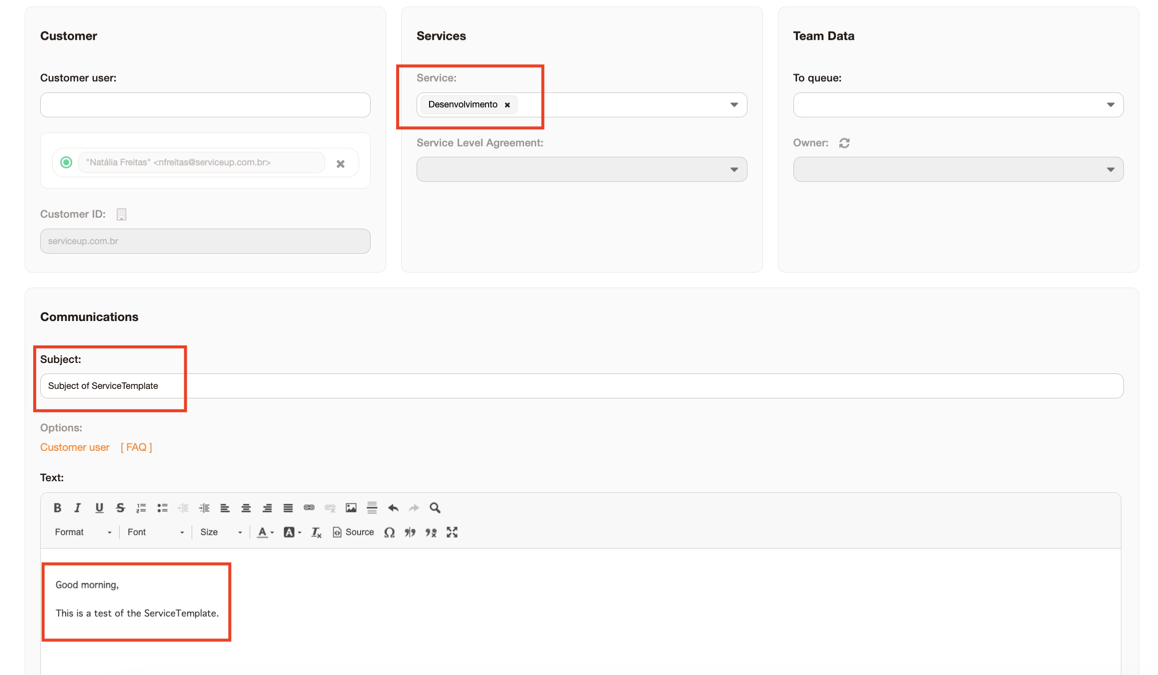
Use in ticket creation
To use the template when creating a ticket, simply select a service that is associated with a template, and the module automatically takes care of filling in the Subject and Text fields according to the registered template: